30 September 2009

When You Come Crash. Into Me, Baby.


According to doubletongued.org,

Smash Cake
n. a celebratory cake intended to be destroyed, especially by a child.

I did a smash cake this past weekend for Alex's birthday. I am definitely not a cake master, thus the name "Little Miss Cupcake," but I have lots of requests for these cakes so decided I'd try my hand at it. This is a vanilla bean cake with caramel buttercream - a cake version of my Caramel Dolce cupcake. It's decorated with some of Alex's favorite things: balls, cars and a plane. The accompanying mini cupcakes were prepared with a similar theme in After Eight, Wake Me Up Before You Go Go and Berry Berry Good varieties.


Overall, I was pleased with how it came out design-wise. I figured any shortcomings would be compensated for with the taste. Alex's mom was kind enough to write me to say, "thank you again for the wonderful cake and cupcakes. They are DELICIOUS and the kids LOVED the little cars, balls, and ESPECIALLY your plane. The moms woo-ed and ahhh-ed as well." So mission accomplished on this one!

Here's a test cake I did just for practice with some oversized peas at the base. I'll get that right next time. It's an orange spice cake with cream cheese frosting.


And for the Dave Matthews fans out there, this is one of my favorite songs and I thought a fitting choice for the subject of this post! :)

27 September 2009

Every Picture Tells a Thousand Stories : A Daring Bakers'Challenge


Or in this case, the lack of baked goods related pictures tells only one story. The morale of it being: if you happen to be an Acer laptop and you don't want your owner to dropkick you out the window and into the street, please be kind and allow said user to get back into her Daring Baker's picture folder! Fume, fume!

Since I don't have my beautiful vol au vents pictures to share with you today, what I thought I would show are some of the photos enclosed in Helmut Newton's Sumo. If you've never heard of this book, I believe it is the largest book ever published (over 35 kilos) and packed with some of the most exquisite works of art by this talented master of photography. A few years ago, I had looked into buying a copy and almost choked on the cup of coffee I was sipping when I learned the going price was about 6,000$.


Luckily, the hubby discovered a few weeks back that a brand new smaller (yet still quite hefty) version that comes with its own stand has been issued to mark the book's ten year-anniversary. It's an awesome collection and I only wish that Helmut was still around to tell us thousands more stories captured in each of his photos.


Without further ado, here's the story of this post (sans vol au vents pictures but here's a last one from Helmut):


The September 2009 Daring Bakers' challenge was hosted by Steph of A Whisk and a Spoon. She chose the French treat, Vols-au-Vent based on the Puff Pastry recipe by Michel Richard from the cookbook Baking With Julia by Dorie Greenspan.

I had worked with puff pastry before in cooking school and found this recipe fairly simple and straight-forward. The resulting puff pastries were light and buttery but not overly so. I highly second the reco to cover them with a silicon mat for the first 15 minutes of baking (or crowd them together a bit on your baking sheet). I did neither one and ended up with several lopsided looking pastries.

You can fill these with all sorts of savory or sweet fillings. I went with two sweet varieties. One was a French classic reminiscent of an eclair: a simple chocolate creme patissière filling; I then drizzled a melted chocolate glaze over the top of the filled vol au vent. For the second, I was inspired to do something 100% americana in contrast and created one that the King would have loved : filled with a banana cream, I topped this one with marshmallows and peanut butter chips then popped it under the broiler for about 2 minutes, and then added sliced bananas and shaved chocolate. Man, was it good!

I'll keep trying to see if I can pull up those pics. I think my laptop and I are going to have to take this offline for a little private chat. But in the meantime, here's the recipe for you home bakers! (And to see some pictures of Vols au Vents other Daring Bakers baked up this month, visit our Flickr Group here or see this google search).

Michel Richard’s Puff Pastry Dough
From: Baking with Julia by Dorie Greenspan

Yield: 2-1/2 pounds dough
Ingredients:
2-1/2 cups (12.2 oz/ 354 g) unbleached all-purpose flour
1-1/4 cups (5.0 oz/ 142 g) cake flour
1 tbsp. salt (you can cut this by half for a less salty dough or for sweet preparations)
1-1/4 cups (10 fl oz/ 300 ml) ice water
1 pound (16 oz/ 454 g) very cold unsalted butter

+ plus extra flour for dusting work surface

Put the all-purpose flour, cake flour, and salt in the work bowl of a food processor fitted with a metal blade and pulse a couple of times just to mix. Add the water all at once, pulsing until the dough forms a ball on the blade. The dough will be very moist and pliable and will hold together when squeezed between your fingers. (Actually, it will feel like Play-Doh.)

Remove the dough from the machine, form it into a ball, with a small sharp knife, slash the top in a tic-tac-toe pattern. Wrap the dough in a damp towel and refrigerate for about 5 minutes.

Meanwhile, place the butter between 2 sheets of plastic wrap and beat it with a rolling pin until it flattens into a square that's about 1" thick. Take care that the butter remains cool and firm: if it has softened or become oily, chill it before continuing.

Incorporating the Butter:

Unwrap the dough and place it on a work surface dusted with all-purpose flour (A cool piece of marble is the ideal surface for puff pastry) with your rolling pin (preferably a French rolling pin without handles), press on the dough to flatten it and then roll it into a 10" square. Keep the top and bottom of the dough well floured to prevent sticking and lift the dough and move it around frequently. Starting from the center of the square, roll out over each corner to create a thick center pad with "ears," or flaps.

Place the cold butter in the middle of the dough and fold the ears over the butter, stretching them as needed so that they overlap slightly and encase the butter completely. (If you have to stretch the dough, stretch it from all over; don't just pull the ends) you should now have a package that is 8" square.

To make great puff pastry, it is important to keep the dough cold at all times. There are specified times for chilling the dough, but if your room is warm, or you work slowly, or you find that for no particular reason the butter starts to ooze out of the pastry, cover the dough with plastic wrap and refrigerate it . You can stop at any point in the process and continue at your convenience or when the dough is properly chilled.

Making the Turns:

Gently but firmly press the rolling pin against the top and bottom edges of the square (this will help keep it square). Then, keeping the work surface and the top of the dough well floured to prevent sticking, roll the dough into a rectangle that is three times as long as the square you started with, about 24" (don't worry about the width of the rectangle: if you get the 24", everything else will work itself out.) With this first roll, it is particularly important that the butter be rolled evenly along the length and width of the rectangle; check when you start rolling that the butter is moving along well, and roll a bit harder or more evenly, if necessary, to get a smooth, even dough-butter sandwich (use your arm-strength!).

With a pastry brush, brush off the excess flour from the top of the dough, and fold the rectangle up from the bottom and down from the top in thirds, like a business letter, brushing off the excess flour. You have completed one turn.

Rotate the dough so that the closed fold is to your left, like the spine of a book. Repeat the rolling and folding process, rolling the dough to a length of 24" and then folding it in thirds. This is the second turn.

Chilling the Dough:

If the dough is still cool and no butter is oozing out, you can give the dough another two turns now. If the condition of the dough is iffy, wrap it in plastic wrap and refrigerate it for at least 30 minutes. Each time you refrigerate the dough, mark the number of turns you've completed by indenting the dough with your fingertips. It is best to refrigerate the dough for 30 to 60 minutes between each set of two turns.

The total number of turns needed is six. If you prefer, you can give the dough just four turns now, chill it overnight, and do the last two turns the next day. Puff pastry is extremely flexible in this regard. However, no matter how you arrange your schedule, you should plan to chill the dough for at least an hour before cutting or shaping it.

To Cut Pastry:

Dock the solid bottom rounds with a fork (prick them lightly, making sure not to go all the way through the pastry) and lightly brush them with egg wash. Place the rings directly on top of the bottom rounds and very lightly press them to adhere. Brush the top rings lightly with egg wash, trying not to drip any down the sides (which may inhibit rise). If you are using the little “caps,” dock and egg wash them as well.

Line a baking sheet with parchment and set aside.

Using a knife or metal bench scraper, divided your chilled puff pastry dough into three equal pieces. Work with one piece of the dough, and leave the rest wrapped and chilled. (If you are looking to make more vols-au-vent than the yield stated above, you can roll and cut the remaining two pieces of dough as well…if not, then leave refrigerated for the time being or prepare it for longer-term freezer storage. See the “Tips” section below for more storage info.)

On a lightly floured surface, roll the piece of dough into a rectangle about 1/8 to 1/4-inch (3-6 mm) thick. Transfer it to the baking sheet and refrigerate for about 10 minutes before proceeding with the cutting.

(This assumes you will be using round cutters, but if you do not have them, it is possible to cut square vols-au-vents using a sharp chef’s knife.) For smaller, hors d'oeuvre sized vols-au-vent, use a 1.5” round cutter to cut out 8-10 circles. For larger sized vols-au-vent, fit for a main course or dessert, use a 4” cutter to cut out about 4 circles. Make clean, sharp cuts and try not to twist your cutters back and forth or drag your knife through the dough. Half of these rounds will be for the bases, and the other half will be for the sides. (Save any scrap by stacking—not wadding up—the pieces…they can be re-rolled and used if you need extra dough. If you do need to re-roll scrap to get enough disks, be sure to use any rounds cut from it for the bases, not the ring-shaped sides.)

Using a ¾-inch cutter for small vols-au-vent, or a 2- to 2.5-inch round cutter for large, cut centers from half of the rounds to make rings. These rings will become the sides of the vols-au-vent, while the solid disks will be the bottoms. You can either save the center cut-outs to bake off as little “caps” for you vols-au-vent, or put them in the scrap pile.

Dock the solid bottom rounds with a fork (prick them lightly, making sure not to go all the way through the pastry) and lightly brush them with egg wash. Place the rings directly on top of the bottom rounds and very lightly press them to adhere. Brush the top rings lightly with egg wash, trying not to drip any down the sides (which may inhibit rise). If you are using the little “caps,” dock and egg wash them as well.

Refrigerate the assembled vols-au-vent on the lined baking sheet while you pre-heat the oven to 400ºF (200ºC). (You could also cover and refrigerate them for a few hours at this point.)

Once the oven is heated, remove the sheet from the refrigerator and place a silicon baking mat (preferred because of its weight) or another sheet of parchment over top of the shells. This will help them rise evenly. Bake the shells until they have risen and begin to brown, about 10-15 minutes depending on their size. Reduce the oven temperature to 350ºF (180ºC), and remove the silicon mat or parchment sheet from the top of the vols-au-vent. If the centers have risen up inside the vols-au-vent, you can gently press them down. Continue baking (with no sheet on top) until the layers are golden, about 15-20 minutes more. (If you are baking the center “caps” they will likely be finished well ahead of the shells, so keep an eye on them and remove them from the oven when browned.)

Remove to a rack to cool. Cool to room temperature for cold fillings or to warm for hot fillings.

Fill and serve.

24 September 2009

Living in a Material World


Unlike the woman from whose womb I sprung, I was born with a defective female gene. You know the one that incites so many women to indulge in retail therapy a/k/a the shopping gene. Many people don't know this about me but I would rather endure a root canal than go shopping. And this sentiment has only gotten worse since I have had kids (9 out of 10 times I'll have at least 1 of them trailing behind me in the store just as impatient to get out of there as I am but obviously too young to properly control this building stir-craziness) and moved to France (where I can tell you the customer certainly is NOT king).


It's funny cause once a very long time ago, I had actually dreamed of working in retail as a post-college career. The bulk of my summers were spent working as a salesgirl in various stores throughout Manhattan. All I can say is thank god, Melrose Place came along and that brainy, blonde and okay, bitchy Amanda Woodward steered me off the retail path and into a much more savvy and glamorous form of selling: the world of advertising!


Though I can say that my summers in retail entertained me to no end. I once worked in a very upscale women's apparel store where they actually encouraged us to wear the clothes during the workday, then steam them and hang them back on the racks before we left. Not a very hygenic practice; I often found myself telling loyal customers not to buy items that had been worn by one of the other gals we called Stinky Susan. You can guess why. Clothing issues aside, there was a very large aquarium in the store where the owner kept 2 baby sharks. On days that I worked with her alone, she wold send me off to the local pet store to buy feeder fish and then chuckle loudly as she fed these to the circling sharks. Hello Cruella De Vil!


Another summer I worked in a small athletic gear store next to an upscale private health club. One afternoon when I was alone in the store, Paul Stanley from rock band, Kiss, came in. He was very friendly and asked me to recommend several different brands of bike shorts. I thought he was really cool til he called me to the fitting room, "Oh miss...." and asked me "What do you think of this?" He was standing there completely naked save for the tiniest, form-fittingest bike shorts and a big smile. I probably turned 10 shades of red as I tripped back over a display and mumbled something about needing to check the front of the store. Whether or not Paul was interested in having me "take his measurements" or just giving him an honest opinion on the shorts, I'll never know but it certainly was one of my more memorable moments in retail.


Speaking of embarrassing moments, I cannot tell you how many times when I worked in a small department store this would happen: a guy would enter, start looking through the lingerie section with a kind of panicked look on his face, and when I asked if I could help him, he'd say he was looking for a gift for his girlfriend...maybe a bra and underwear set. When I would ask, well, what size do you need? He'd take a look at me and say, "She's probably about your size." Guys, I beg of you, please do not continue to do this. Not only do we find it insulting to have you staring at our privates as you mentally compare us to your loved one, but frankly it's creepy. Be kind and ask your girlfriend to note her sizes for you next time. I promise it'll be much easier for you in the store and when you take that gift home, it'll avoid the inevitable hissy fit size 6 girlfriend throws cause you mistakenly bought her size 12 lingerie. Sorry ladies but sometimes your creepy boyfriends left me no choice but to talk them into a *very* large pair of granny panties!


The one positive thing I can say about retail is the employee discount. Following a holiday season working at Bloomingdale's, I wound up with an amazing set of assorted barware. Seriously, I have a closet full of the stuff - champagne glasses, rocks glasses, martini glasses, margarita glasses and on and on. Now I've never used half the stuff but hey, I got it cheap!

Which brings me to the subject of today's post. Two retail clients contacted me recently for events at their HQ. The first was GAP who was throwing its employees a small party to thank them and celebrate 40 years of the brand. They requested 40 cupcakes in shades of white and blue with their logo. These pictured are Vanilla Lovers and Storm cupcakes with hand-made (can't you tell?) fondant decorations.


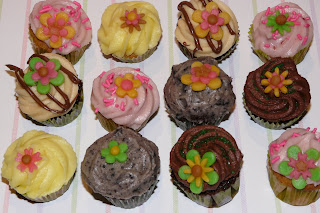
The pastel-colored minis are an order for French department store Printemps. They too were having a small co-worker together and ordered an assortment of After Eight, Chocobutter, Berry Berry Good, Cookies n Cream and Lemon Tart mini cupcakes. In my opinion, retail is best in small doses! ;P

23 September 2009

Things That Go Bump in the Night

Halloween is just around the corner. Little Miss Cupcake will be baking up some ghoulishly delicious treats for your Halloween party needs. Make sure to book your orders early.

Oh and while you're at it be sure to check out the new for Fall flavors. I promise they're good....devilishly good! Mwhahaha Mwhahaha!

20 September 2009

It Aint Easy Being Green


Unless you are a cupcake. A vegan cupcake like the ones pictured here that I baked up this past week. 100% vegan, 110% delicious, and bio/organic to boot. They could almost be called the good for you cupcakes!

I get many, many requests from people with dietary restrictions, allergies, particular eating habits, etc. asking if I can accommodate their needs. The simple answer is yes. To me, life without cupcakes would be oh so sad, so just because you have nut allergies or milk allergies or just plain don't like eating things that come from a cow, doesn't mean you shouldn't be able to enjoy all that cupcake yumminess.

Here are some carrot cake cupcakes I made this week without nuts.


So, if you've given up on cupcakes cause you think there's nothing for you, give me a try. The world is so much rosier when seen through cupcake-tinted glasses! ;P

17 September 2009

Here Comes the Bride, All Dressed in...Red?!?


Yup, you read that right. For the bride in this case is of the non-conventional variety. She and her partner decided to tie the knot after several years of "living in sin" (oh, the horror!) with 2 kids at their sides during the nuptials and a 3rd proverbial bun in the oven tucked under that gorgeous red throw she was wearing!


In my spare time, I handle PR for a wonderful parents' association for English-speaking families here in Paris called MESSAGE. We organize all sorts of great family-fun events, provide many support services like breastfeeding help and pre-natal classes, and overall serve as an extended family for throngs of expats who find themselves far from home. I've made many terrific friends over the years through this organization - people from all walks of life, from every corner of the globe, with all sorts of traditional and non-traditional family lifestyles. One of my greatest pleasures has been the opportunity to steer the organization via serving on its Executive Board, and that is how I came to know the afore-mentioned bride. Though she was married over the summer, we were unable to coordinate cupcakes for her actual wedding day and so the ones you see here were fashioned for her and her betrothed belatedly.


She is Dutch and her husband is French (And a fireman too! Woo hoo!). The only guidelines she gave me for these were that they be orange - you can read the history of the Dutch passion for orange here - and could they include "E's" for both her and the mister's first initials are "E" as well as pay tribute to their nationalities in the form of flags? Oh, and maybe have some sort of liquor in them too (I told you she was non-conventional!).

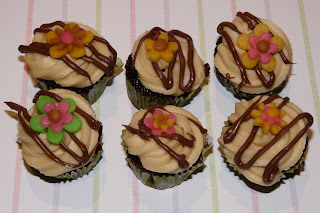
What did I come with? Two varieties of cupcakes : one that is wildly Cointreauversial (I was inspired by the lovely Dita von Teese who the hubby and I saw live last week; what a performance!) and one that is oh so de-lovley and delicious: the Orange Zinger cupcake! The chocolate ones that you see here with the Dutch and French "flags" are made from dark chocolate cupcakes, lovingly drizzled with a Cointreau glaze and topped with a milk chocolate and Cointreau buttercream. The heart flags are marzipan printed with words of love like "Cherish, Adore and True Love" and hand-painted with food coloring. The Cointreauversial Cupcake will be joining the Little Miss Cupcake line-up soon along with a few other Adult-Only varieties.


The Orange Zinger Cupcakes are orange cupcakes filled with an orange spice cream and topped with a white chocolate ganache frosting. They are decorated with home-made marzipan and marshmallow fondant. Here's the recipe; the cupcakes are great on their own plain if you want to add a little zing to your breakfast plate.


Orange Zinger Cupcakes
Makes approximately 14 cupcakes

For the Orange Cupcakes:
4 ozs. unsalted butter, softened
3/4 cup sugar
1 large egg
1 tsp. baking soda
½ tsp. salt
1 ½ cups flour
½ cup buttermilk
¼ cup hot water
¼ cup Pulco or other concentrated orange syrup
zest of one orange

Pre-heat oven to 350/180 degrees. Grease 1 12-cup cupcake tin and 2 cups of second tin or insert cupcake liners.

Sift baking powder, salt and flour in medium-sized bowl and set aside. In a separate bowl, cream the butter and sugar until light and fluffy. Add egg and blend well. Alternately beat in flour mixture and buttermilk, blending well after each addition. End with a flour addition.

Add hot water and mix well. Add zest and Pulco last and mix.

Fill cupcake tins 2/3 full. Fill unused cup molds halfway full with water. Bake for 18-20 minutes until a toothpick inserted in center comes out clean. Once cool, remove cupcakes from tin and continue to cool on a wire rack.

For Orange Spice Cream Filling
(adapted from a recipe from I Heart Cuppycakes, originally from Dorie Greenspan's Book, Baking: From My Home to Yours)

1/2 cup sugar
Grated zest of 1 orange
2 large eggs, preferably at room temp
1/2 cup fresh orange juice (from about 1 medium sized orange)
1/4 tsp ginger
1/2 tsp cinnamon
1 teaspoons cornstarch
3 ozs. (1/2 cup+2 tbs) unsalted butter, cut into tablespoon size pieces, at room temp

Combine sugar and orange zest in a heatproof bowl. Rub the sugar and zest between your fingertips for a few minutes, until the sugar is moist and the fragrance of orange is strong. Whisk in the eggs, then whisk in the juice and cornstarch.

Bring water to a simmer in a saucepan.

Set the bowl over the saucepan and stir with a whisk as soon as the mixture feels tepid to the touch. Cook the orange cream until it reaches 180 degrees F, about 10 minutes. Whisk constantly to keep the eggs from scrambling – you’ll see that the cream will start out light and foamy, then the bubbles will get bigger, and then, as it gets closer to 180 degrees F, it will start to thicken and the whisk will leave tracks. When it starts to leave “tracks” the cream is almost done.

As soon as it reaches 180 degrees F, remove the cream from the heat and strain the cream; discard the rest. Let it cool until it reaches 140 degrees F, about 10 minutes.

Add ginger and cinnamon. Whisk to incorporate. Add the butter a few pieces at a time until butter is incorporated and continue whisking for another 3 minutes until mixture is thick and creamy.


Pour the cream into a container, press a piece of plastic wrap against the surface and refrigerate the cream for at least 4 hours, or overnight. (The cream can be packed airtight and frozen for up to 2 months; thaw overnight in the refrigerator.)


For White Chocolate Ganache Frosting:


4.5 ounces white chocolate
1/2 cup heavy cream
1/2 tsp vanilla
1/2 tsp butter, room temperature
2-3 cups powdered sugar

Break up chocolate and place in a heatproof bowl. In a small casserole, heat cream until just about boiling. Remove from heat and pour over the chocolate. Let sit for 1 minute then stir until combined. Next add the butter and vanilla and stir until combined.

Let cool for 10 minutes. Using a whisk or electric hand-beater, sift in powdered sugar one cup at a time beating after each addition. Continue adding sugar and beating until mixture is of good spreading consistency.

Optional : I added a few drops of orange coloring to make the color really pop.

For assembly, cut a small inverted cone out of the top of each cupcake and set aside. Spoon about 2 tbsp. cream filling into each cupcake. Cut off most of the cone/part that fits inside of the cupcake and replace cap on cupcake, eat scraps.


Once filled, frost cupcakes with an offset spatula or a pastry bag fitted with a star tip. Eat, enjoy!

11 September 2009

Thank Heaven for Little Girls

Thank heaven for little girls
for little girls get bigger every day!


Thank heaven for little girls
they grow up in the most delightful way!


Those little eyes so helpless and appealing
one day will flash and send you crashin' thru the ceilin'


Thank heaven for little girls
thank heaven for them all,
no matter where no matter who
for without them, what would little boys do?


Thank heaven... thank heaven...
Thank heaven for little girls!

Lyrics & Music by Alan Jay Lerner and Frederick Loewe


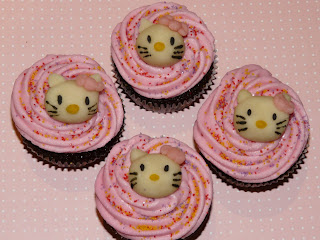
A sampling of cupcakes for my little girl's 2nd birthday today with all of her favorite characters!

08 September 2009

No Sleep Til.....


(cue rap music)...BROOKLYN! Or in my case, "la rentree." Here in France, there is much fanfare surrounding "la rentree" which means quite literally: the return. The closest US equivalent would be "back to school," but the concept of la rentree is in fact much broader as it's not just students who are involved, but the larger population of France. La rentree refers to the early September period when students head back to school and just about everyone else is coming off a leisurely summer break and reprising the daily grind.


If you have visited France during the long month of August, you probably noticed that the whole country pretty much just shuts down (unless you are at a resort area). We were in and out of Paris mid-August and it was like a ghost town. Many businesses are closed in August (yes, that's right, for the whole month!) and so la rentree is considered a period of new beginnings, new hopes, new trials, etc.; for many this time of the year is even moreso symbolic than say January 1st.


We returned from NYC in the midst of la rentree - my son had just one day to recuperate from our travels before heading back to school and my poor husband actually went into the office on the day we landed. I had a few days of reprieve before my first cupcake order; it's been a tough readjustment for all of us as we deal with the demands on our time and jet lag. We've been home a week now and it almost feels like we never left. It's funny how you just settle back into your routines and daily life.


I hope you all enjoyed some time off over the summer and that you are experiencing "la rentree en douceur" (kind of like "a soft landing" for your back to school). Here are a few cupcake pics from my rentree orders; more to come in the coming days including some new flavors for Fall!

02 September 2009

Hot Child (& Cupcakes) in the City


Just back in from the US and trying to cope with the jet lag that had us all up at 1 AM this morning! Boy, did the summer go fast or what? Our trip to New York passed by in a New York minute and I was very sorry to leave. Despite my best intentions, I didn't get to even a fraction of the stuff I had planned so hopefully I'll have another good excuse to get back to my hometown sometime soon.

As those of you who follow my blog know, I was in Manhattan to see my best friend get married and what a wedding it was! Between the bachelorette's at Lips, a drag revue in the West Village (here's a pic of the fabulous "Joan Rivers"); the rehearsal dinner at an old-school Italian in midtown East; and the wedding itself at the Harvard Club, I spent the better part of my free time wining and dining my way across the city.


I did manage to get a little shopping in at NY Cake & Baking Supplies in Chelsea, and visit a handful of the local cupcakeries I have been reading about for the past few years on my favorite blog: Cupcakes Take the Cake.


Of the 5 cupcakeries I personally sampled (4 in NYC, and 1 in NJ that was too horrific to even name here), hands-down Two Little Red Hens on the Upper East Side was my favorite. The best cupcake? The Brooklyn Blackout which is a moist Chocolate Cake with Chocolate Pudding at its center and a rich fudgy frosting. (IMHO, any of their cupcakes which has this fudge frosting is spot-on). I also tried their Red Velvet (which was my second favorite NY cupcake) - the cream cheese frosting was dense yet light and tasted like cheesecake. The cake itself was moist and a vibrant red but not nuclear red and complemented the cupcake unlike so many other RVs that just serve as a vehicle for the frosting.
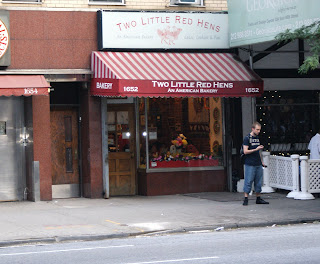


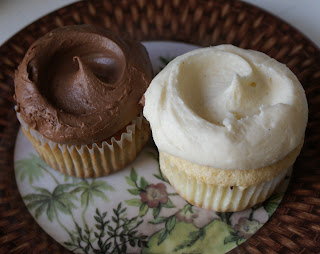
I also sampled their Marble cupcake (marble Chocolate/Vanilla cupcake with Chocolate/Vanilla twist icing) and two of their American Classics: Vanilla cake with Vanilla Buttercream and Chocolate cake with Vanilla Buttercream. All were very, very good and I ended up buying cupcakes from them 3 times! The boutique itself is charming in a rustic decor and inviting. While the wait was a bit long each time we were there, there are lots of beautiful cakes and decorating supplies to look at. Two Little Red Hens is definitely the cupcakery I'll be stopping in the next time I'm in town.


Next on my list was the CupcakeStop Truck which I happily stumbled upon one day while down in the Flatiron District (truck pic courtesy of www.examiner.com). There was no line to get a cupcake though I hear that they do a pretty brisk business. Just after I ordered my Red Velvet and Carrot Cake cupcakes, a woman wandered over, said something very discreetly to the counterperson and walked away with a mini cupcake. I, of course, chased her down the street to find out that by mentioning "joonbug" the first 500 customers were entitled to a free mini of their choosing. I ran back and went with a Peanut Butter Chocolate Swirl mini. I liked the cake of this one very much - it was rich and chocolatey, but the frosting was a tad overly sweet and peanut buttery for my tastes.


The Carrot Cake was moist and packed with shredded carrots. I didn't care for the Red Velvet at all, and there was so much red food coloring in it that when my daughter took a bite of it, the crumbs that fell on the floor stained the rug!

Crumbs Bake Shop has locations all over the city and unfortunately the day I went in, I was feeling a little too ill (read: hungover) to order anything. But their display cases were impressive with at least 25 different flavors on offer.


Their cupcakes are big and beautifully decorated. I would have liked to take a picture but they wouldn't let me; this one comes courtesy of www.daemonsfood.com. Several friends tell me that Crumbs is their favorite cupcakery in Manhattan and I'll be sure to sample them on my next trip.


On our last full day in Manhattan, my husband and I packed up the kids and made our way downtown to the High Line which is a newly opened above-ground park in the West Village. It's built on the abandoned old elevated train track and is a wonderful place to spend a sunny day. We meandered around our old neighborhood which has very few holdouts still in place from the original Meatpacking days. It's now mostly upscale shops and chi chi restaurants and clubs; things sure have changed a lot since our days there.


After a quick stop in the Ink Pad and a look-see at our old neighborhood standby, Magnolia Bakery on Bleecker, where you can see their twin mixers beating up some buttercream in the window, we headed over to the East Village to visit Butter Lane and Chikalicious Dessert Club.


Of the two, Butter Lane was my preferred cupcakery. Not only is it a really cute little shop with super friendly staff, but I liked their build-a-cupcake concept. The idea is so basic - you choose one of their about a dozen frosting flavors in either American or French versions (the American is standard confectioners' sugar and butter whereas the French contains eggs) to go on one of the several cake choices. I had read some customer reviews on Yelp before stopping down and so decided to go with a Vanilla cupcake with American Vanilla Buttercream and a Banana Cupcake with American Chocolate Buttercream.


I really liked the flavor combo of the banana and chocolate, and the vanilla/vanilla was simply delicious -- the vanilla buttercream was good and rich without being too sweet. My one complaint was that the cake of each was a little too dry and dense for my taste but it was Sunday and quiet in their shop, and maybe the cupcakes had been hanging out for a while.

I had read a lot about Chikalicous before my trip and had very high hopes for them. Sadly, they fell a bit short. While the store itself is quite drab and dingy, their cupcakes are beautiful to look at.


The frosting which has a somewhat mousse-y consistency tops each in a flawless shiny dome. Since they didn't have descriptions of each cupcake, I ended up ordering 3 filled varieties (which they call Premium) and I really would have liked to try one of their basic flavors; I didn't realize this mistake until I was back uptown and it was too late to get more. My problem with Chikalicious was that while various components of the cupcakes were delicious - the salted Caramel center of the Caramel cupcake, the chocolate mousse topping on the Triple Chocolate Cupcake, the Marshmallow Frosting on the S'more cupcake - and their cakes were moist and airy like I like them, the cupcakes in entirety didn't work for me.


The chocolate center of the Triple Chocolate was too dark and bitter and totally overwhelmed the cupcake. The cake of the S'mores cupcake was overly spicy and cinnamony - I think they were going for a Graham Cracker flavored cake and ended up with something more akin to a Carrot Cake spice profile which didn't work at all with the rest of the cupcake. And as for the Caramel, it was very sweet and too flavorful - I could barely get through my third of the cupcake. I'm not counting Chikalicious out as I really will go back and try a simpler variety the next time I'm in the Big Apple but I have to admit I was a bit disappointed with this round.


Lastly, I wanted to share a picture of some cupcakes I spied at E.A.T on Madison Avenue which were by far the most beautiful cupcakes I saw during my visit. I didn't try these but was told they are vanilla and chocolate with poured vanilla and chocolate glaze. Pretty, no?


And the fun ceramic cupcakes you decorate yourself at FAO Schwarz.

Well, that pretty much sums up my trip to some of New York's infamous cupcakeries. If you are in the NY area or have visited NY recently and want to share some thoughts on your favorite cupcakeries and/or places I should visit on my next trip to the Big Apple, do leave me a comment below. In the meantime, I'll be fooling around in my kitchen trying to come up with a home-made version of TLRH's Brooklyn Blackout cupcakes that are worthy of their namesake. Man, just thinking about them has me drooling!

Yours in Cupcake Love,
Little Miss Cupcake xx

Cupcake Addresses:
Two Little Red Hens, 1652 2nd Avenue (between 85th and 86th Streets)
Butter Lane, 123 East 7th Street (between 1st and Avenue A)
Chikalicious, 204 East 10th Street (between 2nd and 1st Avenues)
CupcakeStop Truck, various; follow them on twitter for locations @cupcakestop
Crumbs Bake Shop, various; I stopped in at 1371 Third Avenue (between 79th and 78th Streets)
E.A.T, 1064 Madison Avenue (between 80th and 79th Streets)
Magnolia Bakery, various; the original is at 401 Bleecker Street (on the corner of West 11th Street)